

Key Takeaways
Putting a logo on a hat is mostly choosing the right method. Flat embroidery suits clean solid shapes, 3D puff suits thick letterforms, woven patches hold fine detail, and printing or sublimated patches carry gradients. A PNG or JPEG is enough, no Photoshop. Place it on a live preview, order as few as 1, and approve your proof first.
Table of Contents
- Which Customization Method Reproduces Your Logo Best?
- Get Your Logo File Ready (No Photoshop Needed)
- Where to Put a Logo on a Hat
- How to Put Your Logo on a Hat in the Design Studio
- Matching Your Logo's Colors on the Hat
- Frequently Asked Questions
- Start with One Hat
You do not need Photoshop, Illustrator, or any design software to put your logo on a hat. A PNG or JPEG of your logo is enough. Almost every question about putting a logo on a hat comes down to one decision: which customization method reproduces your artwork faithfully. Thread, patches, and printing each handle detail, color, and texture differently, so the right choice depends on what your logo looks like.
This guide matches each logo type to its best method and shows you how to get your file ready. Then it walks through placing the logo on a real hat in Griwolfe's Design Studio, so you see the result before you order.
Which Customization Method Reproduces Your Logo Best?
Match the method to the artwork. Clean shapes and solid colors reproduce well in standard flat embroidery. Thick, bold letterforms suit 3D puff embroidery. Very fine text and thin lines hold better on a woven patch.
Gradients and photographic artwork need printing or a sublimated patch. A leather patch gives texture instead of color, with a colored deboss option if you want both.
If cost or order size is driving your choice between thread and a patch, that decision has its own guide: embroidery vs. patch hats.
| What your logo looks like | Best method | Why it works |
|---|---|---|
| Clean shapes, solid colors, readable text | Standard flat embroidery | Thread follows defined edges cleanly and reads professional at front-panel size |
| Thick, bold letterforms or a chunky icon | 3D puff embroidery | The raised foam base needs wide strokes to wrap around |
| Very fine text, thin lines, small interior detail | Woven patch | Fine threads hold detail that stitching cannot |
| Gradients, photos, or many colors | Printing or a sublimated patch | Both are full color with no color limit |
| A simple one- or two-color mark | Leather patch | Engraving or deboss carves the mark into the leather; a colored deboss option adds color |
Embroidery itself comes in three styles: standard flat, 3D puff, and 3D puff chain stitch, a variant with a different texture and stitch pattern. You pick the style right on the product page after choosing embroidery.
Thread is the limit to watch. Embroidery cannot hold very fine lettering or hairline detail, because a stitch is wider than the stroke it is asked to follow.
A VP of operations at an aluminum trailer manufacturer recently sent us an AI-generated design they wanted embroidered. The lettering and fine details were too small for thread to capture. We recommended a woven patch, which holds that level of detail, and prepared a design proof to approve before production.
Patches come in five types: woven, sublimated, embroidered, leather, and PVC, and each favors different artwork. PVC is the exception: pick it for where the hat will live (water, sun, daily outdoor wear) more than for how the logo looks. Browse custom patch hats to see all five on real products.
Get Your Logo File Ready (No Photoshop Needed)
PNG and JPEG files work in the Design Studio today. If your logo lives in another format, like an AI (.ai), SVG, or PDF file, email it to custom@griwolfe.com. Our design team brings it into your order, and more file formats are in development.
You do not need Photoshop to clean up the file first. If your logo sits on a background, the BG Removal button removes it in one click. Upload the file you have, remove the background, and keep working.
If you made your logo with an AI generator, it will usually download as a PNG or JPEG and upload like any other file. AI-generated and vector artwork are ideal, and we work with whatever file you send.
A bigger, sharper file gives production more to work with. If the only copy you have is small or a little blurry, upload it anyway and mention it in the placement's Add note field. We fix artwork files in-house, and the design proof we email you shows exactly what will be made before production starts.
Where to Put a Logo on a Hat
The front panel is the standard home for a main logo, and most orders put it there. A front design can run across the full front, or sit on the front-left or front-right panel. The back takes a website, a slogan, or a founding year, on the strap itself or arched above the closure opening. The left and right sides fit small secondary marks, like an icon or initials.
Hats offer up to four placements: front, back, left, and right. Each placement carries its own design and its own customization method. A leather patch on the front works alongside embroidered arched text on the back of the same hat.
Two habits keep a front logo readable. Keep it near the middle of the panel rather than edge to edge. Judge the live preview from arm's length instead of zoomed in.
If production should follow an exact size or position, add a note on the placement. We will match it, confirmed on your proof.
How to Put Your Logo on a Hat in the Design Studio
The whole path runs on the product page, and it usually takes a few minutes from upload to cart.
- Open the product page for the hat you want. Every hat's page lists the placements you can decorate. There is no separate app.
-
Check the placement your logo goes on. Front is the usual choice for a main logo.
-
Pick the customization method for that placement. The options are Embroidery, Patch, or DTF (full-color printing), and style choices appear after you pick, like the five patch types.
-
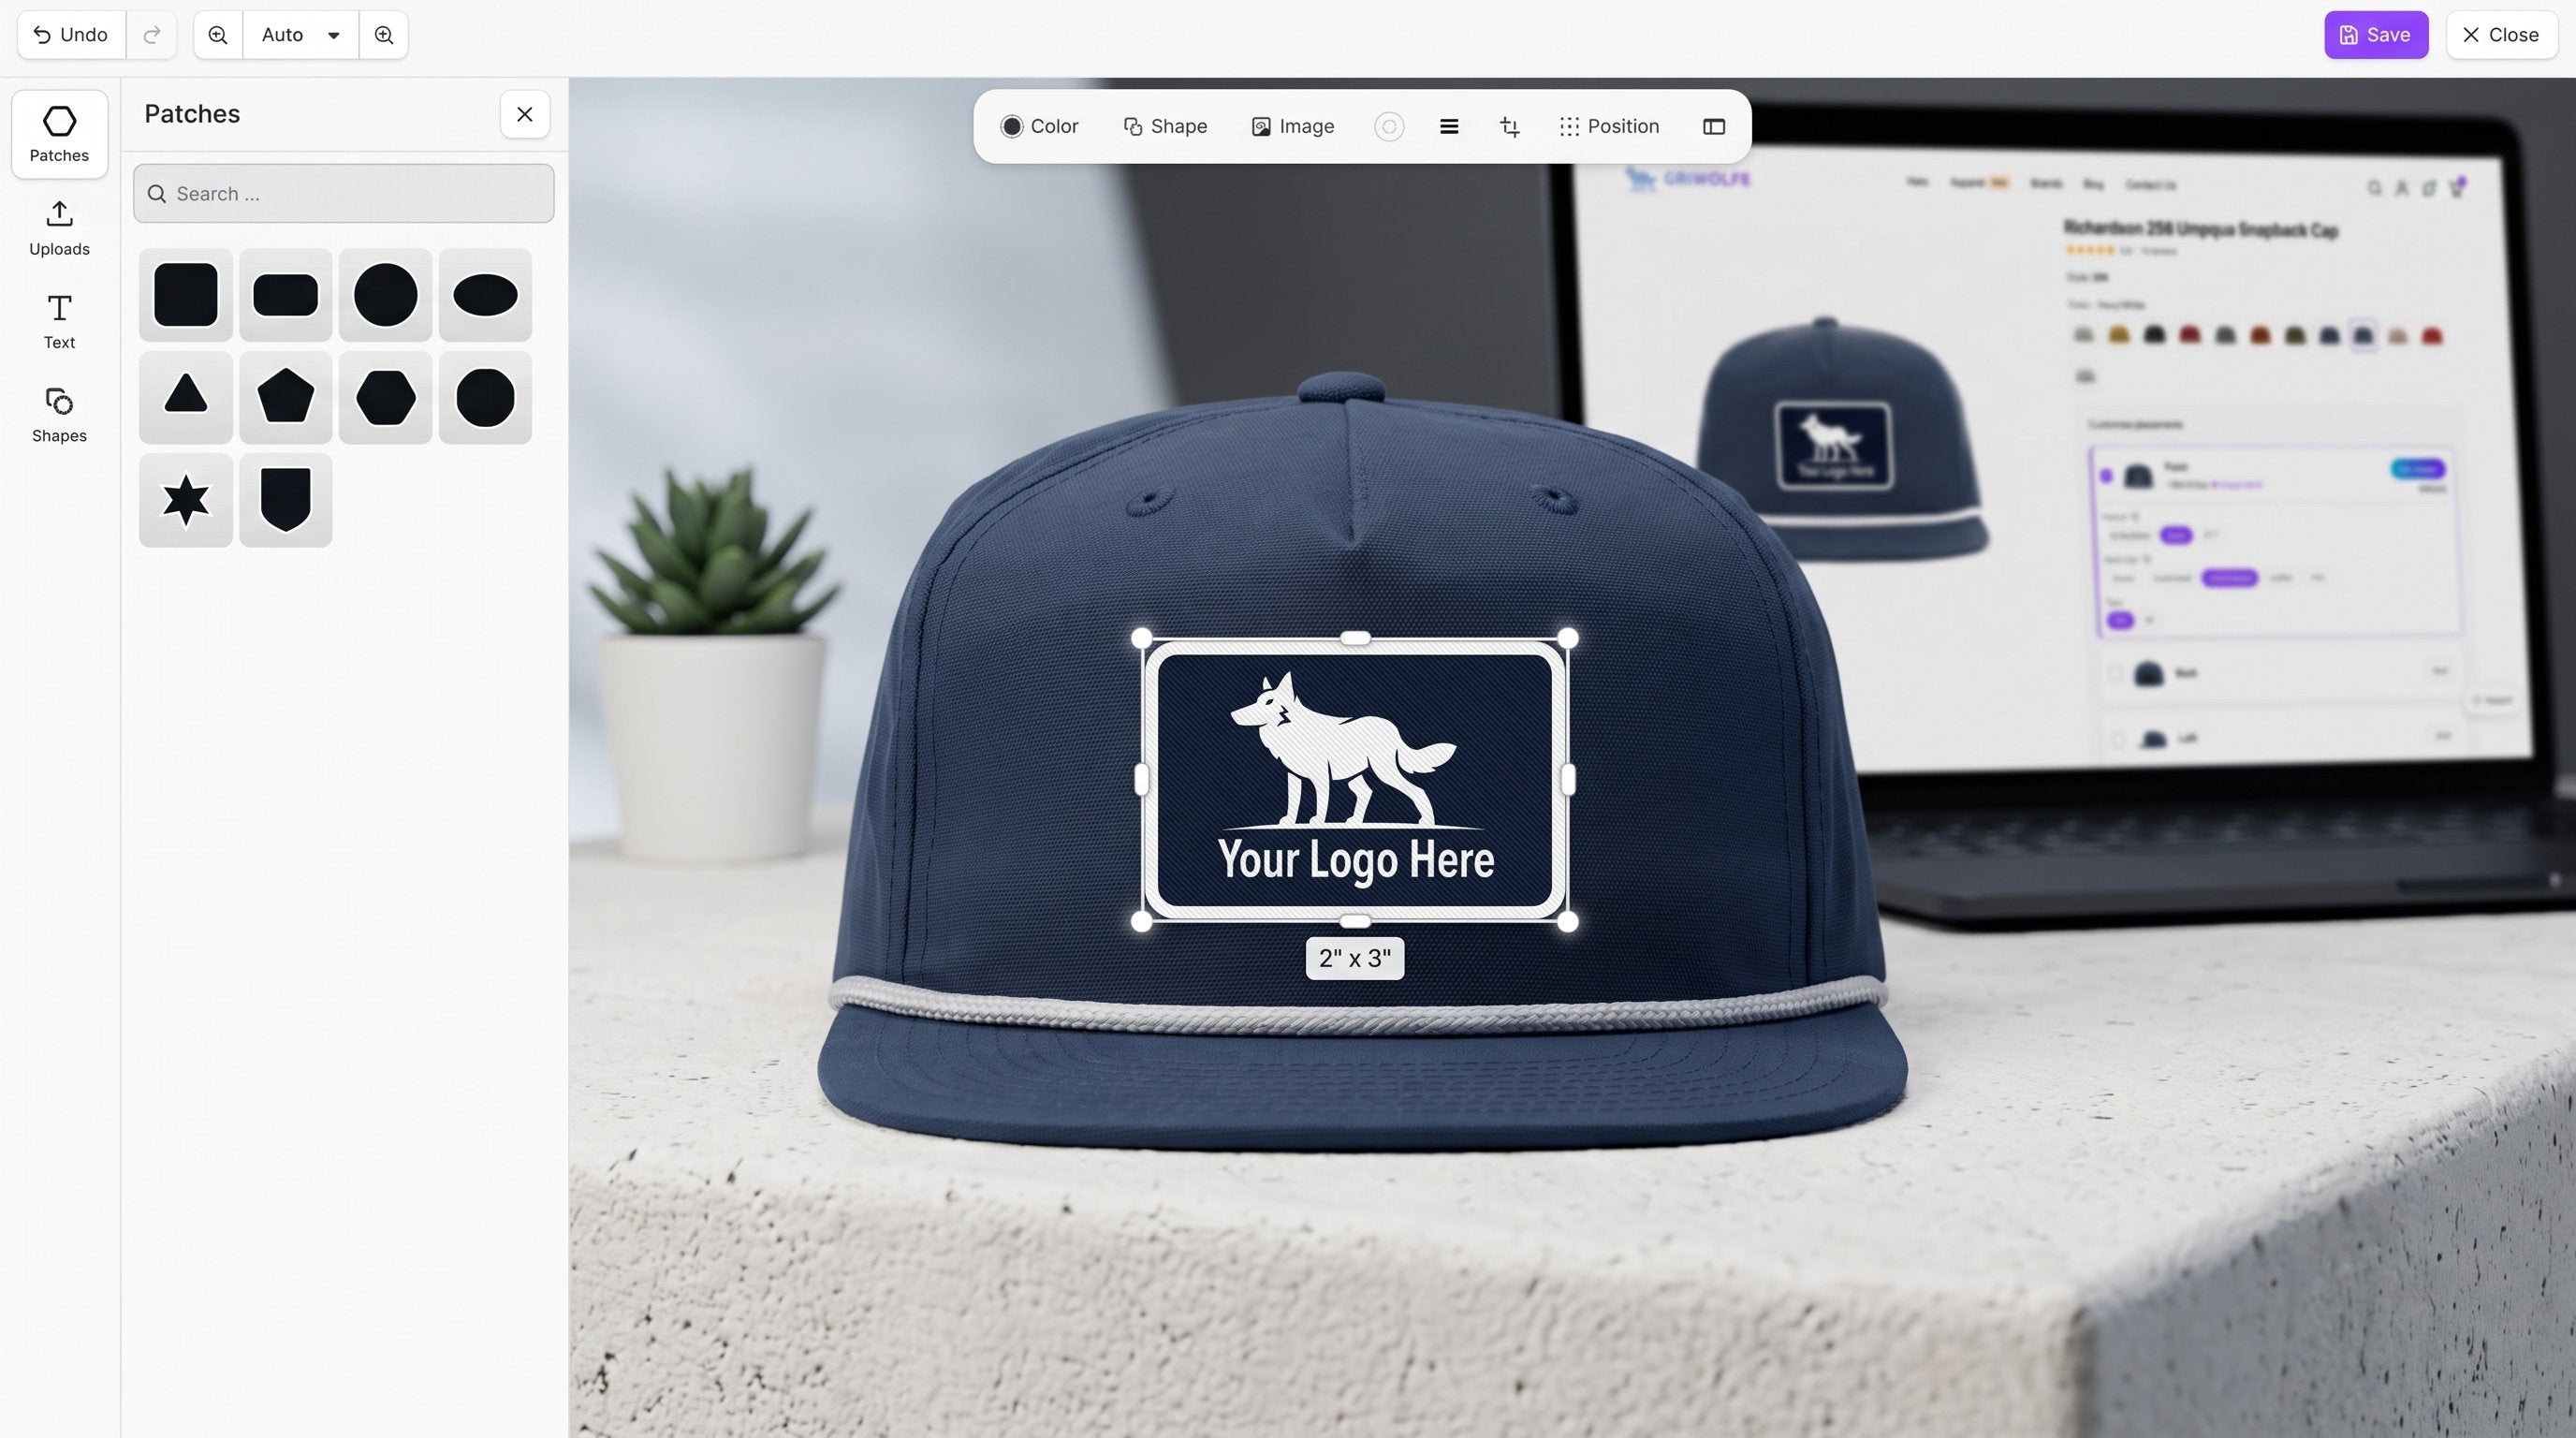
Click Customize to open the Design Studio. The canvas is the actual hat in the color you chose.
-
Upload your logo in the Uploads panel. PNG and JPEG work today.
-
Click BG Removal if your logo has a background.
-
Size and position the logo on the live preview. Drag it and scale it, and the hat updates as you work.
-
Save the design. The placement now reads "Design added" with a small preview of your design.
-
Set your quantity, then pick a size if the hat comes in sizes. Many hats are one size fits most.
-
Add the hat to your cart and check out. If the cart refuses the hat, the placement's design is not saved yet; repeat step 8.
The Add note field covers anything specific you want handled. Write it in the placement's note and our design team makes it happen; you confirm the result on your emailed proof. If you get stuck mid-design, live chat reaches the design team instantly.
After checkout, we email a production-ready design proof within 1 to 2 business days, with unlimited free revisions. Production starts only after you approve it. Standard production is 2 weeks for embroidery and printing, and 4 weeks for patch methods. Rush service runs as low as 3 business days; contact us by phone, email, or live chat to arrange it.
This guide covers the logo path. For the full Design Studio tour, text, curves, shapes, and the cart, follow our walkthrough of designing your own hat online. Ready to start with thread? Shop custom embroidered hats and click Customize on any style.
Matching Your Logo's Colors on the Hat
Upload a logo for embroidery and the Design Studio reads its colors automatically. You then swap each detected color to any offered thread color. A navy in your file becomes a navy thread on the hat.
Color counts have practical limits in thread. We recommend about 7 to 8 colors for embroidery and for most patch types, and embroidery can go up to 15. Printing and sublimated patches print in full color, so gradients and photos need no swapping at all.
If your brand follows an exact Pantone color, we match patch colors to it and pick the closest available thread color for embroidery. Add the code as a note on the placement and it carries through to your proof.
Thread reads by contrast. A logo stitched in a color close to the hat's own color looks tonal and quiet, which is sometimes the goal. Pick a contrasting thread when the logo needs to be legible from a distance.
Frequently Asked Questions
Can I put a logo on a hat without Photoshop?
Yes. Upload a PNG or JPEG of your logo straight into the Design Studio; no design software is needed. The BG Removal button removes a background in one click, and sizing, placing, and recoloring all happen on the live preview before you order.
Which customization method is best for my hat logo?
It depends on the artwork. Solid colors and clean shapes suit standard flat embroidery. Thick letterforms suit 3D puff. Very fine text holds best on a woven patch. Gradients and photos need printing or a sublimated patch. For a premium, tactile mark, choose a leather patch.
Do I need a vector file to put my logo on a hat?
No. PNG and JPEG files work in the Design Studio today. If you have a vector file, like an AI or SVG file, email it to custom@griwolfe.com and we bring it into your order. More file formats are in development, and we fix artwork files in-house.
How many colors can a hat logo have?
Printing and sublimated patches print in full color, so gradients and photos work. For embroidery we recommend about 7 to 8 thread colors and can stitch up to 15; other patch types run about 7 to 8. Patch colors match Pantone exactly, and thread gets the closest match.
Can I put my logo in more than one place on the hat?
Yes. Hats offer up to four placements: front, back, left, and right. Each carries its own design and customization method; save a design on every placement you check. A front patch with arched embroidered text on the back is a common combination.
Start with One Hat
The hard part of putting a logo on a hat is choosing the method. The routing table at the top of this guide makes that call for you. From here the path is short. Get your PNG or JPEG, open a product page, and place the logo on the live preview.
There is no minimum, so a sensible first order is one hat. Hold it, check the stitching or the patch against your logo, then order the run. Expect a higher per-piece price at one unit, especially for a patch. You approve an emailed design proof before we produce anything, so nothing is made until it looks right to you.
Browse custom hats and click Customize on the style that fits your brand.
Share:
Richardson Hats: How to Pick the Right Model for Your Brand
Foam Trucker Hats: When Foam Beats Fabric (and When Not)