

Key Takeaways
- The strongest designs carry one focal element and one short phrase, in lettering heavy enough to hold its shape in thread.
- A small logo looks intentional on the front-left panel or a side and lost in the middle of a 6-inch front.
- Every idea below is grouped by the method that makes it and previewed on the actual hat first.
Table of Contents
- What Makes a Custom Hat Design Look Professional?
- Embroidered Hat Design Ideas
- Patch Hat Design Ideas
- Printed Hat Design Ideas
- Where Each Idea Fits on the Hat
- What Design Works Best for a Small Logo?
- New Design Ideas for a Black Hat
- Match the Design to the Hat's Era
- Frequently Asked Questions
- Pick One Idea and Build It
Custom hat design ideas fall into three families (thread, patch, and print), and the good ones are picked with the method in mind. A hat front gives you about 6 inches of width on a curve, so a design that fills a T-shirt usually has to lose something. The 14 ideas below are grouped by the method that makes each one. Each names the hat it suits, the placement, and the size we produce it at. A short build note names the step in Griwolfe's Design Studio that makes it.
What Makes a Custom Hat Design Look Professional?
A professional hat design has one focal element, a short phrase at most, and lettering heavy enough to keep its shape in thread. Most of the hats people keep wearing follow that recipe, whether the design is a company logo or an inside joke.

Start by deciding what the design is about, an icon or a word, and let everything else support it. When a sports fan community on a forum told an embroiderer what they'd wear, the answers were specific. They wanted a landmark outline, a player's silhouette, a mascot's head, each with a short phrase, in the team's two colors. Nobody asked for a full logo with a tagline and a website under it.
Weight matters more on a hat than on a shirt. Thin strokes and light fonts fade because the surface is small and curved, and thread has a width of its own. Choose letters with some body, keep the color count at two or three, and leave a margin around the design. On a six-panel cap a wide design crosses the center seam, so a wide wordmark (a name-only logo) belongs on a five-panel or foam front.
The last check is a person who hasn't seen the design, because after two days you're the worst judge of your own work. A buyer on a gaming forum spent days staring at a custom design and couldn't tell anymore whether the embroidered version still looked like anything. The first reply settled it. The commenter couldn't tell what it was until it sat on the black hat, and then it was obvious. Show yours at hat size to a colleague and ask what it is.
The Design Studio shows the design on the actual hat in your chosen color while you build it, which makes that test easy to run. Browse custom hats, pick a style, and try an idea on it as you read.
Embroidered Hat Design Ideas
One or two thread colors on a structured front is the hat most people picture when they hear "custom hat", and for good reason. Thread holds solid shapes and lettering with weight, and the five ideas below lean on that.
1. The Heavy Block Wordmark in 3D Puff
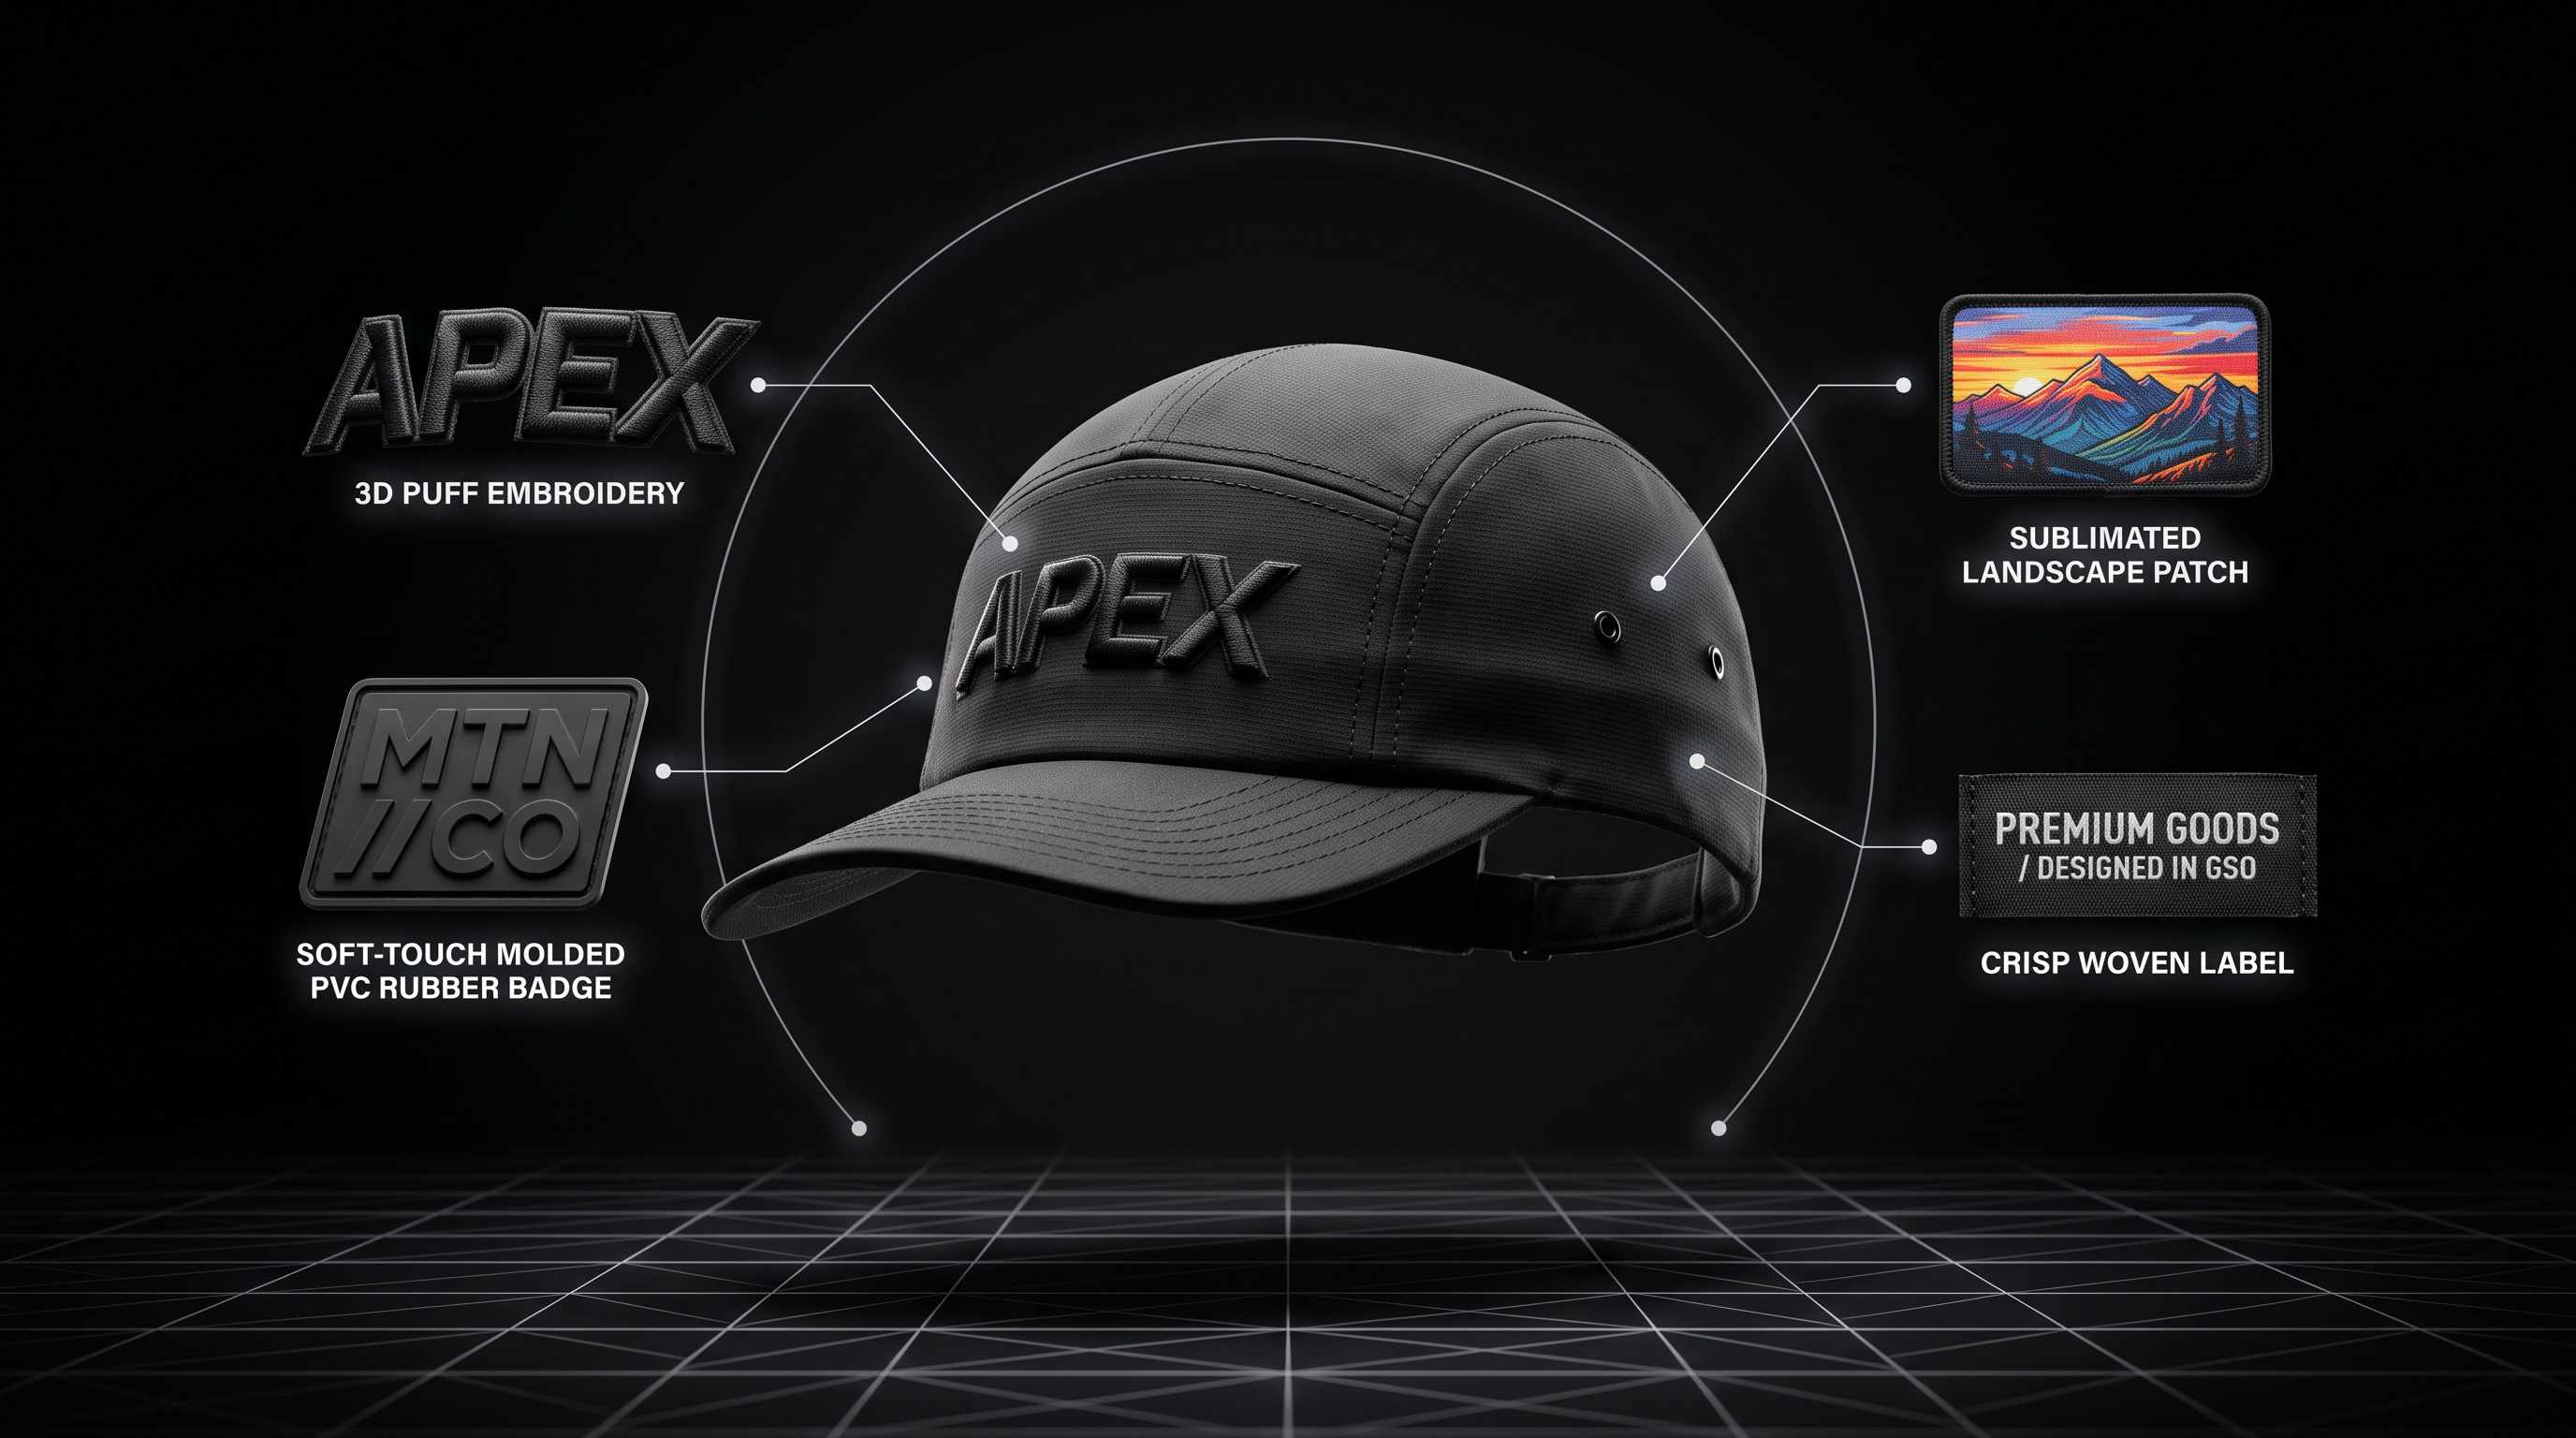
Take one word, or two short ones, set it in a heavy block font, and raise it off the front panel in 3D puff. The foam layer under the stitches makes the letters stand up, and thick lettering is exactly what that raised finish wants. A structured trucker or a foam-front trucker takes it best, across the full front at up to 6 x 2.3 inches.

Build it: on the product page, choose Embroidery for the front placement and pick 3D puff. Then open the Design Studio, add your text in one of the heavier fonts, and keep it to one line.
2. Icon on the Front, Name Arched on the Back
Give the front a single icon on the front-left panel and put the name on the back, arched above the closure opening. Most people see a hat on someone walking ahead of them, so the name still gets seen while the front stays quiet. The front-left panel takes a design up to 2.75 x 2 inches and the back arch up to 4 x 2. A dad hat or an unstructured trucker suits this one, since a small front icon sits well on a relaxed crown.
Build it: two placements, each with its own design. Upload the icon to the front, then add curved text on the back placement and set the curve to follow the closure opening.
3. Outlined Varsity Lettering
Set a short word in a heavy block or collegiate font, stitch it in one color, and outline it in a second. The outline separates the letters from the hat and gives you a two-color design with only one shape to draw. Flat embroidery on a structured baseball cap or snapback suits it, at up to 6 x 2.3 inches across the front. Many team and school hats are built this way, and a company name works for the same reason.
Build it: add the text, turn on the outline control in the Design Studio, and pick the second thread color for it.
4. The Strap Line
The strap on the back of a cap takes a line of embroidery up to 2 x 0.375 inches, and most brands leave it empty. A website, a town name, a founding year, or a crew inside joke all fit there without competing with the front. The strap takes embroidery or printing, since a patch won't fit on it. Fitted caps have no strap, so this is one for snapbacks and strap-back hats.
Build it: choose the back placement, choose Embroidery, and add one short line of text. Write "on the strap" in the placement's note field so production puts it there; you'll see it in position on the emailed proof.
5. Role Words for a Crew
One short word on the side of the hat lets a restaurant or a job site tell roles apart at a glance. "Kitchen", "Crew", or "Owner" in a plain heavy font is enough, and everyone still wears the same logo on the front. The side placement takes up to 3 x 2 inches, which is room for one word with some weight and not much more. Each word is its own side design, so a crew with three roles is three side designs over one shared front.
Build it: add the left or right placement, choose Embroidery, and type the word. Keep it to one line so it sits inside the 3 x 2 inch side panel.
Patch Hat Design Ideas
A patch gives the design its own background, a defined edge, and a raised profile, and each patch type holds a different kind of artwork. The four ideas below cover woven, embroidered patch, sublimated, and PVC patches. Every patch we make is hand-stitched to the hat.

6. The Whole Name, Small
A long business name doesn't fit an embroidered front at a readable size, and a woven patch solves that. Woven holds finer text than thread, so the full name and a tagline can share one patch and still look clean. Keep the background one solid color and the text a single contrasting color. On a structured trucker or a five-panel cap it runs up to 6 x 3 inches across the front.
Build it: choose Patch on the front placement, pick Woven, then set the patch shape and add the text lines in the Design Studio. Anything you want checked, such as which line is the tagline, goes in the placement's note field.
7. The Shape-First Badge
Start from the shape and put the design inside it. A shield with two initials, a hexagon with an icon, or a circle with a short word arched around the edge all work. The ready-made shapes in the Design Studio (circle, shield, hexagon, star) are the starting point, and you can resize them and round the corners. With an embroidered patch, the stitched border makes the shape part of the design, at up to 6 x 3 inches on a structured cap.
Build it: choose Patch, pick Embroidered, select a shape, set its background and border colors, then add the initials or icon on top.
8. The Gradient Sky
A sunset gradient, a mountain photo, a mascot with shading: thread can't do any of these, and a sublimated patch can. It prints the artwork in full color into the patch fabric with no color limit, so gradients and photos come through. It fits an outdoor or lake-house brand, on a trucker or five-panel cap, at up to 6 x 3 inches. A solid border color frames the image and keeps busy artwork contained.
Build it: choose Patch, pick Sublimated, upload the image, and size it to the patch shape. The colors come through as they are in the file.
9. The Molded Emblem
A 3D PVC patch is a soft rubber emblem with raised relief, and it suits bold shapes. A fish silhouette, an anchor, a pair of letters, or the outline of a boat all translate well. It's waterproof, so it suits boat crews and fishing guides in mesh-back truckers. Keep the shapes chunky and the colors few; PVC looks best with two or three solid colors and no fine lines.
Build it: choose Patch, pick PVC, then 2D or 3D, and upload the artwork or build it from shapes and text.
Leather patches are a subject of their own, because leather takes engraving or deboss and rewards a different kind of design. The leather patch hat design ideas guide covers 15 of them with hat pairings. Every patch type above, and leather, is available on any hat. Design your own patch hat in whichever type fits and see it on the actual hat before you order.
Printed Hat Design Ideas
Printing puts full-color artwork on the hat with no color limit, and it keeps the small details that thread would thicken. There's nothing else to choose after picking it, because printing is full color by nature.
10. The Illustrated Front
A hand-drawn mascot, a landscape with six colors, the illustration your designer made for the website: all of these print on the front as drawn. There is no color count to manage and no simplifying pass, because the artwork goes on the hat the way it left the file. A smooth, flat front panel shows it best, at up to 6 x 2.3 inches.

Build it: on the front placement, select Print, upload the artwork, and size it on the live preview.
11. Small Details in Full Color
Printing also keeps a complicated small logo intact. A crest with thin ribbons, a badge with tiny lettering, or a four-color logo with small pieces all print with every color separate. Each line stays as fine as it was drawn. Put it on the front-left panel at up to 2.75 x 2 inches, or across the full front at up to 6 x 2.3.
Build it: the same steps as idea 10, with the front-left panel chosen instead of the full front.
Where Each Idea Fits on the Hat
Every size in this article is a production limit, stated as "up to". A specific hat can take a smaller design than these maximums, and your design proof confirms the exact size before we make anything.
| Idea | Placement | We produce it up to | Method |
|---|---|---|---|
| 1. Heavy block wordmark | Full front | 6 x 2.3 inches | 3D puff embroidery |
| 2. Icon front, name back | Front-left panel; back above the closure | 2.75 x 2 inches; 4 x 2 inches | Flat embroidery |
| 3. Outlined varsity lettering | Full front | 6 x 2.3 inches | Flat embroidery |
| 4. Strap line | Strap | 2 x 0.375 inches | Embroidery or printing |
| 5. Role words | Left or right side | 3 x 2 inches | Flat embroidery |
| 6. Whole name, small | Full front | 6 x 3 inches | Woven patch |
| 7. Shape-first badge | Full front | 6 x 3 inches | Embroidered patch |
| 8. Gradient sky | Full front | 6 x 3 inches | Sublimated patch |
| 9. Molded emblem | Full front | 6 x 3 inches | PVC patch |
| 10. Illustrated front | Full front | 6 x 2.3 inches | Printing |
| 11. Small details in color | Front-left panel or full front | 2.75 x 2 or 6 x 2.3 inches | Printing |
| 12 to 14. Black hat designs | Full front | 6 x 2.3 inches in thread; 6 x 3 inches as a patch | Embroidery or patch |
Beanies and bucket hats take the same ideas at their own sizes. Every beanie placement runs up to 4 x 2.3 inches in embroidery or as a patch, with no printing on knit. A bucket hat front runs up to 6 x 3 inches, with the sides at 3 x 2.
What Design Works Best for a Small Logo?
A small logo works best on a small panel. Centered on a 6-inch front, a 2-inch logo looks like it shrank. Move it to the front-left panel, which takes up to 2.75 x 2 inches, and the same logo looks placed on purpose. The side panels, up to 3 x 2 inches, do the same job. Try moving the logo before you touch the artwork.

If the logo has to stay front and center, split it. Keep the icon on the front and move the name to the back arch, as in idea 2, so both pieces stay readable. A logo with a wordmark under an icon can also drop the wordmark entirely, since the icon carries the brand on a small surface.
Fine lines are the other half of the problem. Embroidered lettering stays readable down to about 0.2 inch tall, depending on the font, so a small logo with tiny text loses the text first. A woven patch holds finer text than thread, and printing keeps thin lines as drawn. So a detailed small logo often does better as a small woven patch or a printed front-left panel.
Which method reproduces a given logo's artwork is its own guide. How to put a logo on a hat covers the method match and why thread has that floor.
With no minimum, the cheapest test is one hat. Order the small logo on the front-left panel and the same logo on the full front, and compare them in hand.
New Design Ideas for a Black Hat
Three designs suit a black hat best: one light thread color, black thread raised in 3D puff, and a bright patch as a color block. Black is the most forgiving background a design gets, because almost any light color shows on it. It's also where a busy design looks busiest.

12. One Light Thread Color and Nothing Else
A single word or icon in one light thread on a black front is the design people recognize fastest. A buyer on a gaming forum saw this first-hand when strangers only recognized the design once it sat in white thread on a black hat. Keep it to one color with some weight, and the hat supplies the contrast. Which light color to use, and which thread pairings work tone-on-tone, is covered in our guide to matching a hat color to a logo.
13. Black on Black, Raised
Stitch the design in black thread on a black hat and raise it in 3D puff. Up close the logo shows as texture and shadow, and from across a room the hat looks plain. Some brands want exactly that, a hat where the wearer looks good and the logo is there for whoever gets close. Use thick letters only, as with any 3D puff design, and a structured front so the raised letters hold.
14. A Bright Patch as a Color Block
On black, a patch with its own background becomes a block of color. A white woven patch with black text does it, and so does a full-color sublimated patch with a bright sky in it. The patch edge frames the design, and the contrast between the black panel and the patch background matters more than any detail inside it. It runs up to 6 x 3 inches on the front, in the patch shape of your choice.
Build it: for all three, choose the black hat on the product page first. The live preview then shows the design on black as you work.
Match the Design to the Hat's Era
Most hat styles carry a decade with them, and a design that matches it looks intended. A buyer on a design-jobs forum wanted initials and a birth year with a 1980s feel, in stylized lettering rather than illustration. That instinct is right, because lettering is what sets the era. The table below pairs each common silhouette with the lettering and graphic style that suits it, and the method that carries it.
| Hat style | The decade it echoes | Lettering and graphic style that fits | Method that carries it |
|---|---|---|---|
| Foam-front trucker | 1970s and 80s | Wide block lettering, one color, a feed-store or racing-sponsor feel | 3D puff or flat embroidery |
| Rope hat | 1980s and 90s golf and club | A small crest or a one-word script, centered above the rope | Flat embroidery |
| Dad hat | 1990s | A small lowercase word or a single icon, on the front-left panel or centered | Flat embroidery |
| Flat bill snapback | 2000s streetwear | A large graphic or fat letters filling the front | 3D puff or printing |
| Five-panel camp cap | 2010s outdoor | A wide horizontal wordmark or a landscape strip | Woven or sublimated patch |
| Corduroy trucker | 1970s | Arched text or a single looped word | 3D puff chain stitch embroidery |

Match the lettering weight to the decade before you match the colors. A thin modern font on a foam trucker looks like a mistake, and chunky block letters on a dad hat look loud. Use one era per hat, because a 1970s corduroy front with 2000s streetwear lettering pulls two ways. If the brand has no era of its own, use the hat's.
Frequently Asked Questions
Can I design a custom hat with text only, no logo?
Yes. The Design Studio has a text tool with a library of fonts, curved text for arches, and an outline option for a second color. A short word in a heavy font on the front, or a name arched on the back, is a complete design. Preview it on the hat before you order.
Can I put a detailed illustration or photo on a hat?
Yes, with printing or a sublimated patch. Both are full color with no color limit, so gradients, shading, and photos come through as drawn. Embroidery turns artwork into solid thread colors and simplifies fine detail, so a detailed illustration in thread loses its shading. The design proof shows the result before production.
What size should a custom hat design be?
A full front design runs up to 6 inches wide, by 2.3 inches tall in embroidery or printing and 3 inches tall as a patch. The front-left or front-right panel takes up to 2.75 x 2 inches and the sides up to 3 x 2. The back above the closure takes up to 4 x 2.

What is the easiest custom hat design to get right?
One word or one icon in a single thread color, flat embroidered on the front of a structured cap. It has no color matching to manage and no fine detail to lose, and it fits every hat style. Order one that way first, then add a second color or a second placement on the next run.
Do custom apparel ideas work the same way as hat ideas?
Mostly, with more room. Embroidery, patch, and printing work on shirts and hoodies, and each hat idea transfers to a larger placement box. A left-chest design runs up to 4 x 4 inches, and a full-front tee print up to 13 x 17 inches. A hat design scales up to a chest without redrawing; the reverse usually needs simplifying.
Pick One Idea and Build It
Pick the custom hat design idea that fits your brand and open the product page. Choose the placement and the method, then put the design on the actual hat in the Design Studio. Change the font, move it, try it on a second color. Three decisions settle most of it:
- The one element the design is about
- The panel it sits on
- The method that holds its detail
When it looks right, order one or a hundred; there's no minimum on any method. A design proof lands in your inbox within 1 to 2 business days, with unlimited revisions before we make anything. Standard production is 2 weeks for embroidery and printing and 4 weeks for patch methods. If you need it sooner, rush service runs as low as 3 business days; contact us by phone, email, or live chat to arrange it.

Browse the Custom Hats collection →
Have a question about your order? Contact us. We'll get back to you the same day.
Share:
What Color Hat Goes with Everything? Match It to Your Logo
Trade Show Giveaways People Keep: Hats, Tees, and How Many